
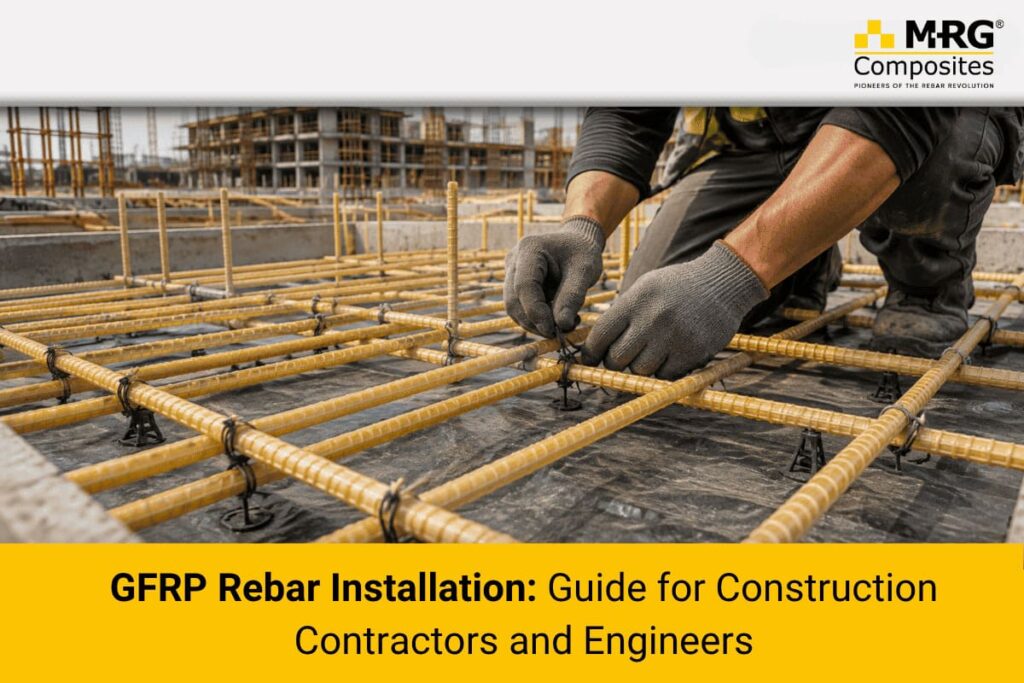
GFRP rebar performs differently from steel throughout the installation process. Cutting, handling, tying, spacing, and splicing all follow different guidelines.
Following the correct installation practices helps maintain the material’s corrosion resistance, strength, and long-term performance.
This GFRP rebar installation guide walks contractors, site engineers, and quality teams through every stage of GFRP rebar installation, from receiving the delivery to the final inspection.
What Is GFRP Rebar and Where Is It Used?
Glass Fibre Reinforced Polymer (GFRP) rebar is a composite reinforcement bar made from continuous glass fibres bound in a resin matrix (polyester, vinyl ester, or epoxy), typically produced by pultrusion with a ribbed or sand-coated surface for bond with concrete. Compared with steel, it is roughly a quarter of the weight, does not corrode, and is non-conductive and non-magnetic. You can review the full technical specification on our GFRP Bars page.
These properties make GFRP rebar well suited to structures where corrosion, weight, or electromagnetic interference are design concerns:
- Bridges and bridge decks, where de-icing salts and moisture drive steel corrosion
- Marine and coastal structures exposed to chloride attack
- Underground and industrial water tanks, and water treatment plants
- Tunnels and precast concrete elements
- Industrial flooring and base slabs, roads, and swimming pools
- Foundations, retaining walls, and septic tank structures
Tools and Materials Required for GFRP Rebar Installation
GFRP is easy to work with on site, but it needs its own toolkit — steel-cutting tools and metal-only accessories are the wrong choice.
- Cutting tools: GFRP rebar should be cut using an abrasive or diamond-blade cut-off saw. Torches and steel-cutting friction tools are not suitable because GFRP is a composite material rather than metal.
- PPE: Wear safety glasses, gloves, and a dust mask or respirator when cutting GFRP rebar, as the process produces fine glass fibre dust that can irritate the skin, eyes, and respiratory system.
- Tying material: Use plastic or non-corrosive coated tie wire to preserve the corrosion resistance of GFRP rebar.
- Chairs and spacers: Use plastic or other non-metallic bar chairs and spacers to maintain the specified concrete cover.
- Factory-bent shapes: Stirrups, L-bars, U-bars, and any curved elements, ordered pre-formed. MRG Composites supplies these as GFRP Bent Bars — see the mechanical design considerations section below for why these cannot be bent on site.
- Mesh: For slab and pavement applications, GFRP Mesh is available as a prefabricated alternative to individually tied bars.
- Mechanical connectors: GFRP-specific couplers, used where a lap splice is impractical (e.g., large-diameter bars or congested detailing). Only use couplers tested and rated for GFRP — never a generic or steel-rated coupler.
Step-by-Step GFRP Rebar Installation Process
Step 1: Verify materials against the drawings.
Check bar diameter, marking, grade, and quantity against the approved shop drawings before you start. Inspect for visible surface damage, delamination, or resin-starved patches — reject anything that doesn’t look right rather than installing and hoping.
Step 2: Cut bars to length.
Use an abrasive or diamond cut-off saw, supporting the bar so it doesn’t crack at the cut. Cut only in a ventilated area and with PPE on, and cut slightly long where field trimming might otherwise force you short.
Step 3: Place chairs and spacers.
Position plastic or non-metallic chairs at the spacing shown on the drawings to achieve the specified concrete cover. GFRP is roughly a quarter of the weight of steel, so it is significantly more buoyant in fresh concrete — chairs and ties generally need to be closer together than an equivalent steel layout to stop the cage floating or shifting during the pour.
Step 4: Place and align the bars.
Position bars according to the rebar placement plan or shop drawings. Because GFRP bars are far lighter than steel, this step is typically faster and less labour-intensive — but alignment still needs to be checked carefully, since the bars will not visibly “give” the way steel does if something is off.
Step 5: Tie the reinforcement cage.
Tie every intersection with plastic or coated tie wire, using enough tension to hold the bar in place without cutting into or notching the surface — surface damage on a GFRP bar is a genuine strength reduction, not just cosmetic.
Step 6: Form lap splices or install mechanical connectors.
Where bars need to be joined, use the lap splice length specified in the structural drawings — GFRP bond behaviour is different from steel, so lap lengths are calculated independently by the Engineer of Record and are typically longer than the equivalent steel detail. Never shorten a specified lap length to save material or labour. Where lap splices aren’t practical, use a mechanical connector tested and rated specifically for GFRP.
Step 7: Final check before pour.
Walk the cage before concrete arrives: confirm cover, spacing, tie condition, splice lengths, and that no bar has visible damage from handling. Once concrete is poured, none of this is correctable.
Step 8: Pour and vibrate concrete.
Concrete placement and vibration proceed as normal, but keep an eye on the cage during the pour — check that chairs and ties are holding position and that the lighter GFRP cage isn’t floating or drifting out of place as concrete is placed and vibrated around it.
Need Technical Support for a GFRP Rebar Installation?
MRG Composites’ technical team supports contractors and engineers with installation guidance, factory-bent shapes, and project-specific documentation. Browse our GFRP Rebar FAQs for more detail, find a stockist via our Distributor page, or get in touch directly for a project consultation.
- Call: +91 96598 59896
- Email: india@mrg-composites.com
- Website: www.mrg-composites.com
Best Practices for Handling and Storing GFRP Rebar
- Store bars off the ground on dunnage or racking, never in direct contact with soil or standing water.
- Protect stored bars from prolonged UV exposure with a cover or tarp if they will sit on site for an extended period.
- Keep bars away from sharp edges, forklift tines, and anything that could nick or gouge the surface during transport and lifting.
- Handle bundles carefully when unloading — GFRP is light, but bars can still crack if dropped or bent past their elastic limit.
- Never field-bend GFRP rebar. It is a thermoset composite: any attempt to bend it on site causes internal micro-fractures that compromise strength, even if the bar looks fine afterward. All bends, hooks, and stirrups must be ordered as factory-manufactured shapes.
- Never weld GFRP rebar or apply direct heat — the resin matrix is heat-sensitive and welding is not a valid joining method for composite reinforcement.
Rule of thumb: Avoid treating GFRP rebar like steel. Operations such as field bending, welding, or dragging bars across rough surfaces require different handling. Always refer to the manufacturer’s technical datasheet before carrying out these activities.
Common Installation Mistakes to Avoid
- Using steel-rated tools or accessories: Steel cutting torches, uncoated steel tie wire, and metal chairs should not be used with GFRP rebar, as they can compromise its corrosion resistance.
- Attempting to field-bend or re-shape bars: Always order factory-bent stirrups, hooks, and curved elements instead.
- Under-specifying lap splice length: Copying steel lap-length rules of thumb onto GFRP detailing can leave a splice that never develops full capacity. Always use the project-specific value from the Engineer of Record.
- Insufficient chair/tie spacing: Insufficient support can cause lightweight GFRP cages to move during concrete pouring, affecting bar position and concrete cover.
- Skipping PPE when cutting: Glass fibre dust is a genuine irritant to skin, eyes, and lungs — treat cutting as a task that always needs eye, respiratory, and hand protection.
- Ignoring surface damage: A nicked or notched bar surface is a strength reduction, not a cosmetic issue — damaged bars should be flagged and, where significant, rejected.
- Mixing incompatible connectors: Using a generic or steel-rated coupler on GFRP bars can fail well below the bar’s rated capacity — only use couplers specifically tested for GFRP.
GFRP Rebar vs Steel Rebar: Installation Differences
| Aspect | Steel Rebar | GFRP Rebar |
|---|---|---|
| On-site bending | Standard practice | Not permitted — factory-formed only |
| Cutting method | Shears, torch, grinder | Abrasive / diamond-blade saw only |
| Weight & handling | Heavy; needs lifting equipment for larger bars | ~75% lighter; largely hand-carried |
| Buoyancy in wet concrete | Not a practical concern | Notable — needs closer chair/tie spacing |
| Tie wire / chairs | Standard steel or plastic | Plastic / non-corrosive only |
| Lap splice length | Shorter, per IS 456 | Longer, per project-specific FRP design |
| Welding | Common joining method | Not permitted |
| Surface damage tolerance | Relatively forgiving | Notching/gouging reduces strength |
For a broader look at how the two materials compare on strength, durability, and cost — not just installation — see our earlier post, GFRP Rebar vs. Steel Rebar: Strength, Durability & Benefits.
Engineering Design Considerations and Standards
Installation practice follows from the design standard a project is built to, so contractors and site engineers should know which framework governs their job:
- IS 18256:2023 and IS 18255:2023: The Indian material standards covering GFRP bar properties and testing — the basis for BIS licensing in India.
- IRC 137:2022: Indian Roads Congress guidance for using FRP bars in road and highway construction.
- ACI 440.1R-15 / ACI 440.11-22: Widely referenced international design frameworks for flexure, shear, deflection, development length, and detailing of GFRP-reinforced concrete, often used as a design reference alongside Indian material standards.
- CSA S806: The Canadian design standard for FRP-reinforced concrete, another commonly referenced international framework.
A few design parameters that installation teams should always pull from project drawings rather than assume: minimum concrete cover (commonly the bar diameter or 25 mm, whichever is greater, though the project specification governs), bar spacing, and development/lap splice length. These values differ from steel and are calculated by the Engineer of Record for each project — never substitute a steel-based rule of thumb.
MRG Composites’ GFRP bars are independently tested to IS 18255:2023 and IS 18256:2023 under India’s first BIS rebar licence (No. CM/L-7600217414).
Visit the BIS Certified page to explore our testing standards, quality control audits, and detailed certificates documentation.
Inspection and Quality Control After Installation
A short, repeatable checklist before every pour catches most installation issues while they’re still fixable:
- Bar size, grade, and marking match the approved drawings
- No visible surface damage, delamination, or resin-starved sections
- Cover, spacing, and cage position match the structural drawings
- Lap splice and development lengths match the design, not a generic steel rule of thumb
- All ties are secure but not notching the bar surface
- Chairs and spacers are adequate to resist floating/shifting during the pour
- No field-bent, welded, or torch-cut bars anywhere in the cage
- Mechanical connectors, if used, are GFRP-rated with supporting test documentation
Document every pre-pour inspection with photos and signed checklists. This small step provides strong protection during audits, quality reviews, or any future construction disputes.
Frequently Asked Questions About GFRP Rebar Installation
How is GFRP rebar installed?
It is cut to length with an abrasive or diamond-blade saw, placed on plastic chairs and spacers per the structural drawings, tied with plastic or coated tie wire, spliced or connected per the project-specific design, and inspected before concrete is poured.
Can GFRP rebar be cut on-site?
Yes — straight-length cutting to size is a normal site operation, done with an abrasive or diamond-blade saw and appropriate PPE. Bending, however, is not a site operation.
Can GFRP bars be bent after manufacturing?
No. GFRP is a thermoset composite and cannot be field-bent without causing internal micro-fractures. All bends, hooks, and stirrups must be ordered as factory-manufactured shapes, such as MRG’s Bent GFRP Rebar.
What tools are needed to install GFRP rebar?
An abrasive or diamond-blade cutting saw, plastic or coated tie wire, plastic/non-metallic chairs and spacers, GFRP-rated mechanical connectors where needed, and standard PPE (eye, respiratory, and hand protection) for cutting.
Does GFRP rebar require special installation methods?
Yes, in several respects: no field bending, no welding, GFRP-specific cutting tools, non-corrosive ties and chairs, closer support spacing to counter buoyancy in wet concrete, and project-specific (typically longer) lap splice lengths.
What concrete cover is required for GFRP rebar?
Cover requirements are project- and code-specific, but as a general reference point, minimum cover is commonly the bar diameter or 25 mm, whichever is greater. Always use the value specified in your project’s structural drawings.
Can GFRP rebar replace steel reinforcement?
In many non-prestressed applications — roads, industrial floors, precast elements, water tanks, bridge decks, and more — yes, subject to a project-specific structural design. Spacing, cover, and splice details must be engineered for GFRP; it is not a straight material swap on an existing steel drawing.
What are the most common mistakes during GFRP installation?
The most frequent issues are attempting to field-bend or weld bars, using steel-rated tools or connectors, under-specifying lap splice length, insufficient chair/tie spacing (leading to cage floating), and skipping PPE during cutting.
Is GFRP rebar easier to install than steel?
In terms of handling, generally yes — GFRP is roughly a quarter of the weight of steel, so placing and carrying bars is faster and less labour-intensive. However, it follows a different set of rules for cutting, bending, tying, and splicing, so crews need a short orientation before their first GFRP job rather than assuming steel practice transfers directly.